Connect the ScanSnap iX100 to a wireless access point by following the steps below.
-
Install ScanSnap Home on your mobile device. ScanSnap Home can be downloaded from the App Store
or Google Play
.
- Start ScanSnap Home on your mobile device.
- Tap the
icon and select [Scanner] in the menu.
- Select [Scanner setup].
- Select [Configure the Wi-Fi settings for the ScanSnap].
- Select the [iX100] scanner.
- Enter the iX100's SSID under [Network name (SSID)], then tap the [Next] button.
For SSID of your iX100, refer to the label on the back of the iX100.
- Turn on the Wi-Fi switch on the back of the iX100 and tap the [Next] button.
- Power on the iX100 and click the [Next] button.
The Wi-Fi indicator on the iX100 will light up in orange.
- Tap the [Next] button.
- Select the name of the scanner with the [Network name (SSID)] you entered.
- Enter the password for the access point.
- When the [Setup is complete] screen appears in about one minute, tap the [Get started on ScanSnap] button.
- If the setup has been completed successfully, the following screen will be displayed.
-
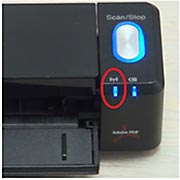
When the iX100 is connected to the wireless access point, the Wi-Fi indicator on the iX100 lights up in blue.

Note:
- If no mobile devices that can be used via Wi-Fi are detected, refer to "Why my mobile device cannot connect to ScanSnap iX100?".
- To configure the settings for using a computer to connect the iX100 to a wireless access point, refer to the following procedure.
-
-
- Turn on the Wi-Fi switch on the back of the iX100 and connect the iX100 to a computer via USB cable.
- Open the feed guide of the iX100 to turn the power on.
- For details on how to connect the iX100 to a computer via Wi-Fi, refer to here.
-
Reference:
To initialize the Wi-Fi settings connect the scanner to a computer by USB cable, and follow the [Initializing the Wireless Network Configuration] procedure below.
・ScanSnap Wireless Setup Tool Help