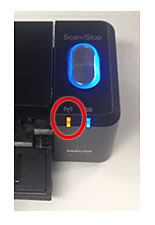
By the following procedure, you can temporarily switch the ScanSnap iX100 to Direct Connect mode.
-
Turn on the Wi-Fi switch on the back of the ScanSnap with the feed guide closed (Power off).
-
While holding down the Scan button, open the feed guide (Power on) and hold the button until the Wi-Fi indicator flashes in green (about 3 seconds).
-
When the Wi-Fi connect mode is changed to the Direct Connect mode, the Wi-Fi indicator lights up in orange.

-
After switching to Direct Connect mode, connect to a network starting with "iX100-XXX" on the Wi-Fi connection window of your computer or mobile device.
The security key or password required for network connection is located on the back of the scanner. When the scanner is in Direct Connect mode, the Wi-Fi indicator will light up in green.
Note: If the ScanSnap iX100 is switched to Direct Connect mode by this procedure, after the ScanSnap is turned off/on or ScanSnap Wireless Setup Tool is operated, it will return to the wireless mode set by ScanSnap Wireless Setup Tool.
Reference
・ScanSnap Wireless Setup Tool Help (Windows)
・ScanSnap Wireless Setup Tool Help (macOS)